How to replace the oven lamp (5)
Resolution

Refer always to your product’s user manual safety information before any repair or maintenance operation. https://www.electrolux.com/support/user-manuals/

WARNING! RISK OF ELECTRIC SHOCK
Before any repair or maintenance operation, deactivate the appliance and disconnect the mains plug from the socket.
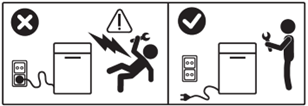
WARNING! RISK OF INJURY

Always take care when moving appliances. For heavy appliances it's safest for two persons to move it. Always use safety gloves and safety footwear. Wear safety gloves at all times to protect from cuts from sharp edges.
WARNING! RISK OF EYE INJURY

Wear safety glasses if you perform maintenance or repair work involving springs.
WARNING! RISK OF BURNS
Before any repair or maintenance operation make sure the appliance is not hot.

WARNING! NOT INTENDED FOR CHILDREN
Keep all small parts and packaging out of reach of children under 3 years due to choking hazard. Installation and use should be performed by adults only.
Make sure to use the product only for its designated purpose and verify that it is a compatible part for the intended product.
Do not use or install the product if damaged.
In case of gas appliance, all repairs and maintenance of gas related parts and connections must be made by a qualified person.
Please note that self-repair or nonprofessional repair can have safety consequences if not done properly and might void the warranty. Possessing the necessary know-how is essential.
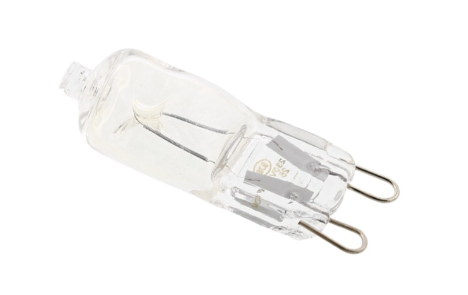
EXCHANGING THE LAMP
If only the lamp needs replacement (and not the fitting), unscrew the glass cover inside the oven, pull out the old lamp, and insert the new one. Handle the new lamp with clean gloves or a dry cloth to avoid leaving marks that could damage the lamp or shorten its lifespan.
HOW TO REPLACE OVEN LAMP AND ITS FITTING
Before replacing any part of the appliance remove the door when the appliance is still mounted in the furniture. Door removal is described in the User Manual.
Screw placement and their number may differ depending on appliance model.
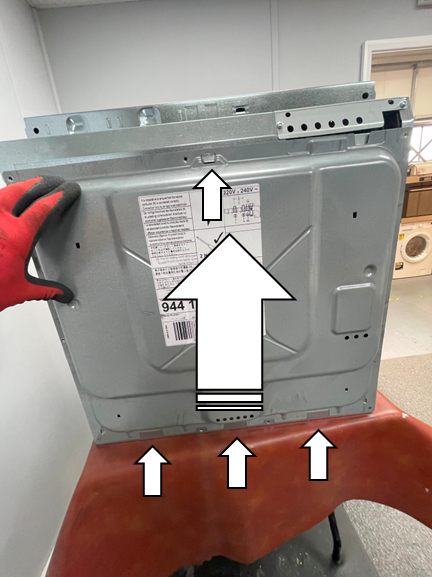
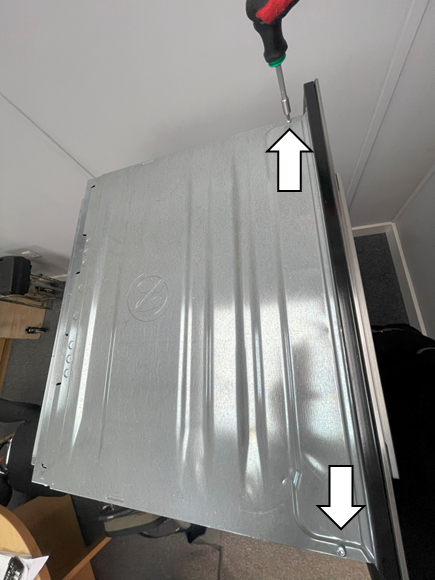
1. Unscrew the screws on the rear panel and then lift the rear panel out of its holding tabs to release. (NOTE: Ensure all tabs are correctly refitted during reinstallation).
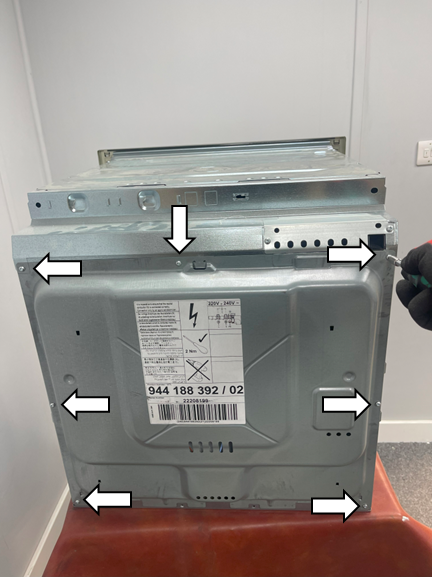
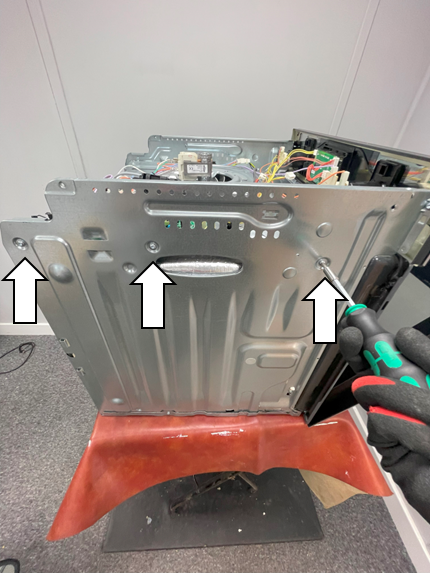
2. Unscrew the screws on the top panel and then slide back and lift to release.

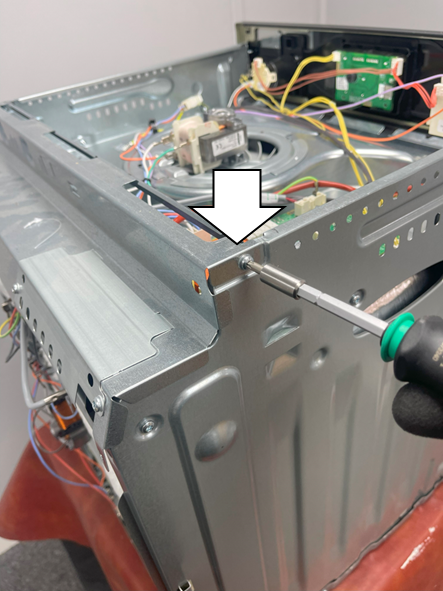
3. Unscrew the screws on either side of the top rear panel and lift to remove.
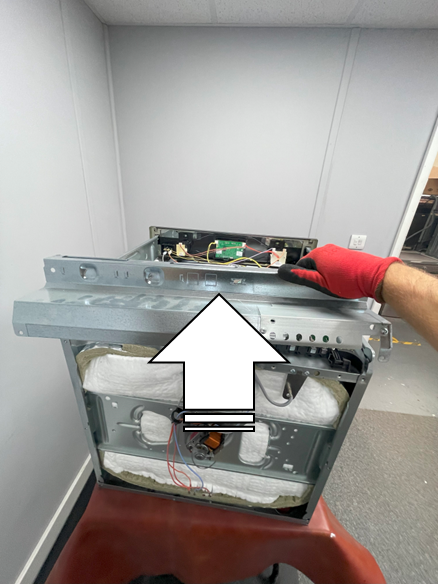
4. Unscrew the screws at the top of the side panel on either side and slide back and lift the inner top panel to expose the light housing.
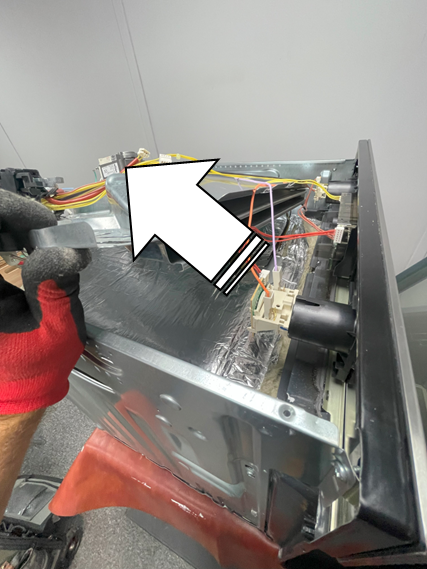
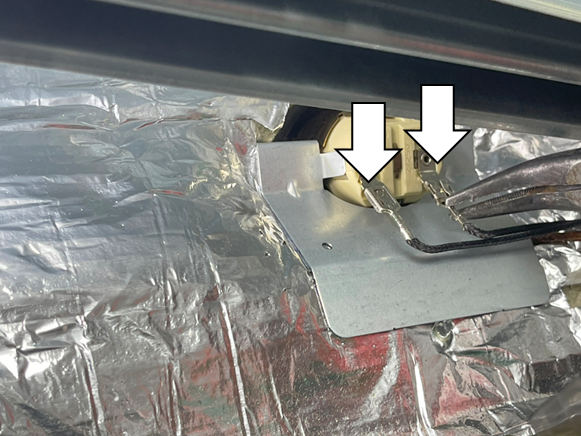
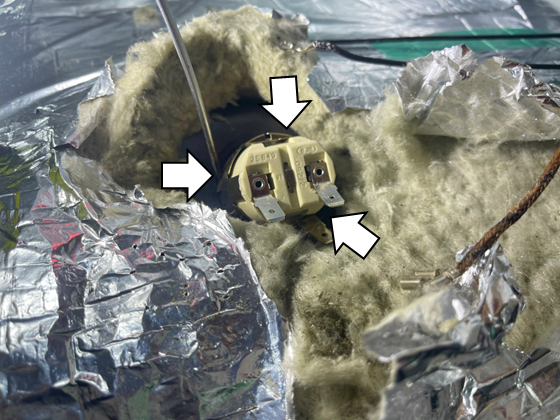
5. Carefully disconnect wiring connectors from the oven lamp spades. (Note: Take a photo of the wiring positioning/location before disconnecting) Be careful not to damage the connector. Ensure during reinstallation that the connectors do not touch the cover or any of the metal work/insulating foil.
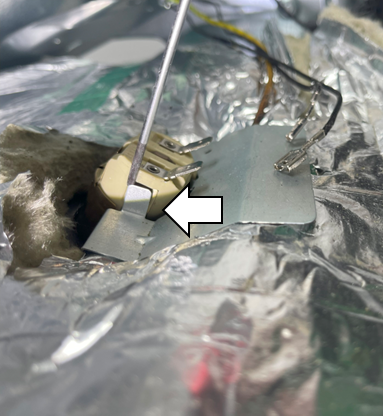
6. Carefully use a small flat bladed screwdriver to unhook and remove the lamp cover. Carefully disconnect wiring connector from the oven lamp earthing spades (Note: Take a photo of the wiring positioning/location before disconnecting) Be careful not to damage the connector.
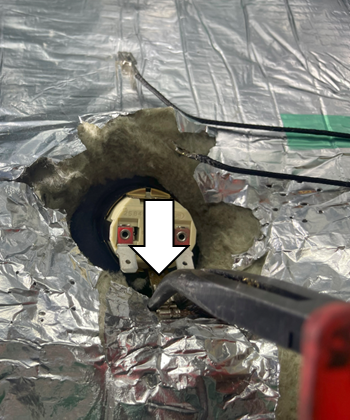
7. Compress the tabs around the lamp housing and then push the lamp housing into the oven cavity to release and remove the oven lamp.
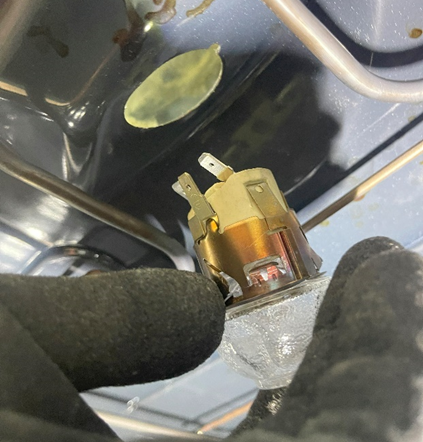
8. When assembling, repeat steps in reverse order.
Was this article helpful?
Related Articles
- How to replace the cooling fan
- ‘Gas-on-glass’ hobs - How to replace the burner cover
- How to replace upper heating element (2)
- How to replace the thermostat
- How to replace the door lock
- How to replace fan/ring heating element (2)
- How to replace upper heating element (4)
- How to replace glass cooking top (1)
- How to replace the selector (3)
- How to replace oven lamp, side